STOP MOTION PROJECT: Before Taking Photos
1. Select your Audio + Materials
You will want to be sure to select and trim your audio BEFORE you start taking photos. Once you have chosen your audio, listen to it a few times and start to pause and take note of the time mark when you notice shifts, beats or changes. Once you have your objects and materials selected, you can begin to make a simple storyboard by arranging your objects within your frame (the field of view of your camera) in ways to visually correspond with these different moments, and taking photos, or simply drawing sketches out of simple arrangements. The interval between each of these scenes will be the time (multiply seconds by 15 in order to determine the exact number of frames) you have to shift and move or otherwise transform the objects from one arrangement to the next. The movement that occurs between these beats essentially lays the foundation for your stop motion.

2. Set a Frame Dimension and Orientation
For this project, unless there is a specific reason for working with a square or vertical format (where the frame height is greater than the width) and you have TA approval, the final stop motion animations should horizontal 16:9 format in order to match common video frame dimensions, and be between 1920x1080 pixels (1080p) and 1280x720 pixels (720p). As you are taking photos, you want to be sure that all of your photos are the same dimension and horizontal orientation.
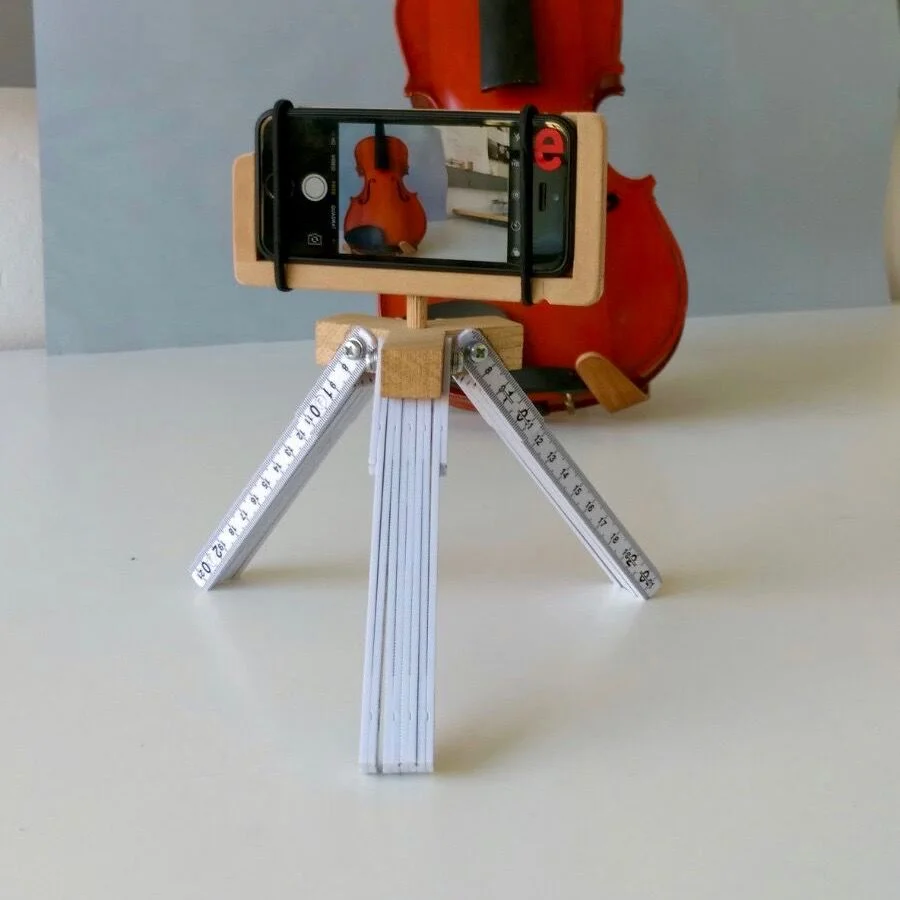
3. Maintain a Consistent Camera Position + Angle
For the most part, unless you are working with camera movement, you will want to keep your camera still and stationary for all photos, which will require marking the camera position in relation to the photographed scenes and using some kind of tripod device to keep the angle consistent. There are many iPhone tripod options available, as well as simple and inexpensive DIY options. You can use things like tape or chalk to mark where your iPhone or camera / tripod is set up, and then to also outline the boundaries of what the camera frame is capturing in each photo - this will help you with the next few steps: lighting, and keeping a clear frame.


4. Check Lighting
You want to be sure your stop-motion objects are well lit, and also ensure that no shadows are being cast by your camera or yourself onto the background or your objects due to overhead lighting or lighting coming from behind (either artificial or natural). Changes in lighting can also effect the overall flow and cohesiveness of stop-motion animations, but when used intentionally, it can create interesting effects.

This can happen a lot with beginning stop-motion
5. Set background + check photo frame
Unless you are using a green screen set-up to add in a background digitally, you will need to design and incorporate an intentional physical background that works visually with your overall stop-motion. This can be as simple as using a solid white or color piece of poster board, assembling some kind of fabric or textile backdrop, or constructing or choosing a material background or surface that works with your other chosen materials (or is made from the same or similar materials). You want this background to fill the entire frame of your photo (as cropping can get a little tricky, especially if your camera moves a tiny bit or if you are working with intentional camera motion.
For this assignment you primarily want to be sure that the background is either somehow connected to your chosen materials and enhances your visuals, or is neutral and does not insert its own visual meanings into your stop motion animation unintentionally. For example, if you are working with metallic objects, think of how a background of a solid grey color, a wooden dorm desktop, a sheet of metal and a flowery fabric sheet would impact and change the overall meaning. In other words, we don't want people to just use what is easiest / most available.
Finally, if your scene set-up has more depth, be aware of all of the objects that fall into the frame space.


