MODULE 1 - PROJECT INSTRUCTIONS
Part 1 - Photo Filters
1. Select 3 photographic filters to reproduce from your camera app, Instagram, or a similar platform (no Snapchat for this project). The filters must be photographic only (no other distortions, blurs, effects or added elements), and must produce color effects and work with color images.
2. In a plain text file, identify which 3 filters you are choosing and describe what each of these filters appear to do to the original images. Do they work with contrast? Do they alter the color balance by adding, emphasizing, or taking away a color or colors? Do they make colors more or less intense? Do they replace one color with another? Do they make image highlights, midtones and/or shadows more or less visible?
Experiment and apply these filters first to 3 of your most neutral ORIGINAL images from the image library project. Open a starter image in Photoshop, and make sure to Save As in a new folder location ( File > Save As >) before overwriting your original images. These images should be at least 600 pixels wide, 800 to 1000 pixels wide is ideal.
Image Adjustment Processes
Use the image adjustment processes in order to reproduce some of the effects of the filter on your original images. Some suggestions would be to use the levels process again, along with other processes such as color adjustment, channel mixer + hue / saturation. Experiment with these different filters based on the changes you observe produced by the original filter. All of these processes can be found under Image > Adjustments >
Color Balance: This process will add or subtract color to the pixels in the image. Selecting Shadows, Midtones and Highlights will apply these color adjustments to the darkest, neutral and lightest pixels in the overall image.


Channel Mixer: This process works with the color mixing processes utilized by screens (additive light channels of Red Blue and Green - RGB - that will combine into a color when mixed together in different percetnages). The Channel mixer will change the balance of Red, Green or Blue light in the master set of pixels (all of them) or a specific channel of Red, Green or Blue. This means that Photoshop will add or subtract 1 or 2 colors to every pixel’s mix of a particular channel. If a pixel is 80% red, and you add blue to that red channel, the pixel will appear more purple.

Hue / Saturation: Working with the saturation sliders in this process will adjust the saturation level (overall color intensity - higher saturation is more intense color, lower saturation will add more gray to the color) of whatever hue is selected in the top slider.

Working with the selection tools
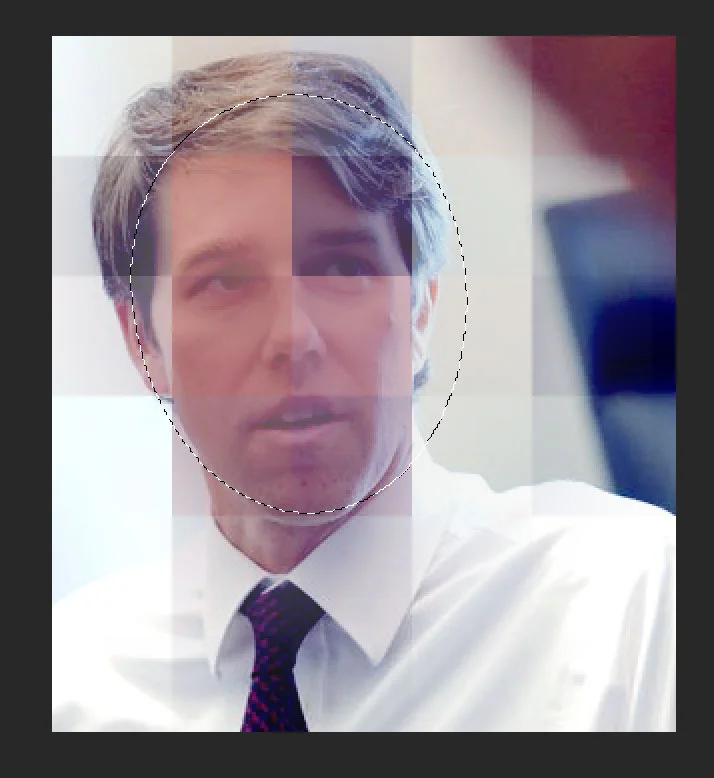
The selection tools can be located in the left hand tool bar, under the 4-way arrow selection tool. They include the square / elliptical selection tool, the lasso tool + the polygonal selection tools + the magic wand tool. Selection tools allow you to select specific pixels in the image, and then only apply processes and effects to those pixels.

Each of the different selection tools produce slightly different outputs in terms of selections - the shape selection tools select specific shapes (hold down shift to select perfect squares or circles), the lasso + polygonal tools select freehand areas that you can determine and the magic wand tool will select areas of connected or adjacent similar pixels. To adjust how similar or different the pixels need to be in order to select, change the tolerance value in the top menu tool bar.

Feathering + Other Selection Processes
The default selection process produces a very hard, visible edge when effects are applied to an image using a selection. This is because pixels are either selected, or not selected.


If you are looking to apply an effect or process with less of a defined edge, use the feathering process Select > Modify > Feather… and then adjust the pixel radius. The larger the value, the more blurred the selection edge will appear. Invert the selection via Select > Invert - this process will deselect all of the selected pixels, and select all of the pixels that are not selected. To deselect all pixels, go to Select > Deselect or Command + D.


Using the History Panel
The History Panel will show all of the steps of edits and adjustments applied to an image since opening. It is accessible via the icon in the right hand toolbar - if this is not visible, go to Window > History. Clicking to steps above other steps will revert your image backwards in time, by multiple steps. Remember, you will need to take a screenshot of this panel once you have completed your filter re-creation in order to show the steps and adjustments you have utilized. You must do this before you close the image file - closing a file or closing Photoshop clears the history.

PART 2 - Photoshop Actions
Actions are like mini programs that you can use to apply the same edits, processes and adjustments to any image, automatically. They can be huge time-savers, especially when you are working with larger libraries of images or image galleries.
For this project you will be designing + creating 2 unique actions that apply stylistic adjustments to an entire photographic image, along with a specialized adjustment or effect applied to the faces present in the image.
Develop a name + a one sentence description for each of your actions (as if you were trying to market it to a target audience or user), and include this in your text file.
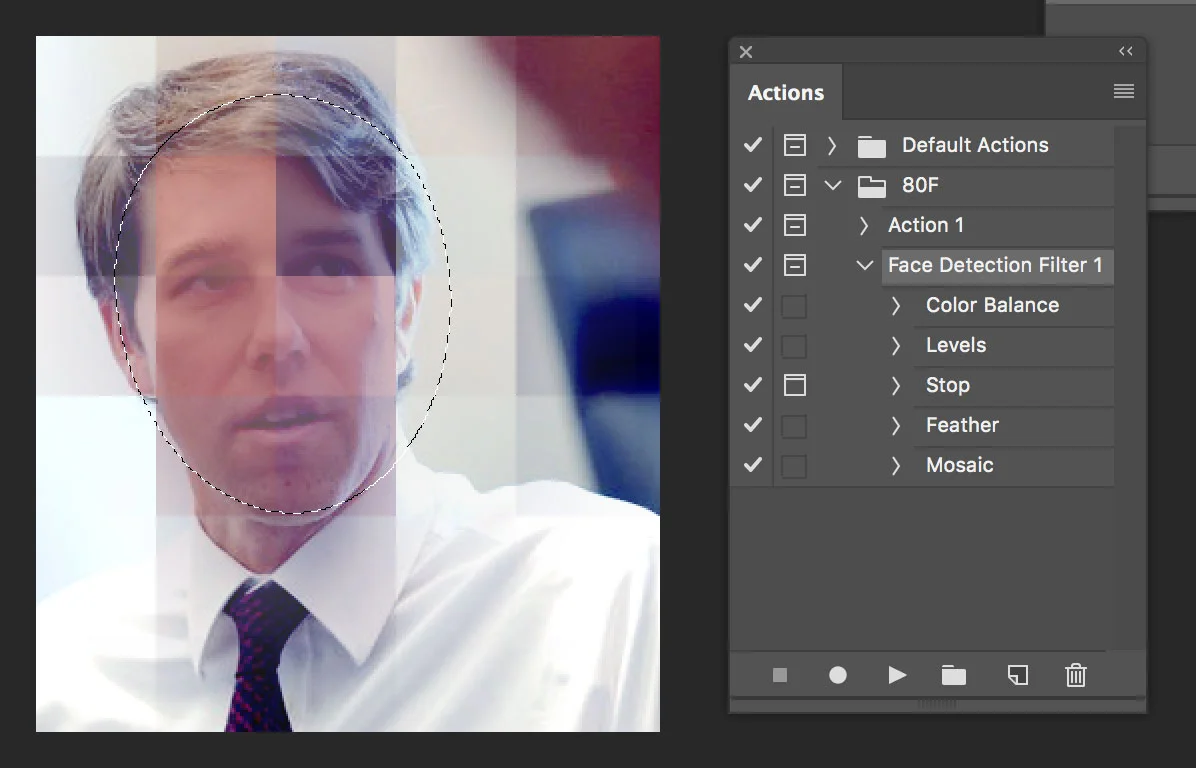
Using the actions panel
The Actions Panel is usually attached to the History Panel. If it is not visible in the right hand tool bar, go to Window > Actions.
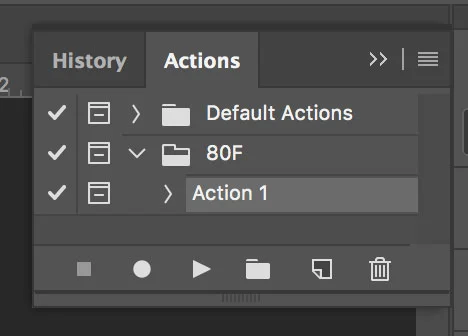
To create a new action:
First create a new action folder set, outside of the Default folder set. Do this by clicking the “new folder” icon on the Actions Panel. Then create and name a new action by selecting the “new action” icon (the the left of the trash icon) in the Action Panel. The export function requires that your actions be inside this folder.
Now you are ready to program your actions. Once you have opened an image, before applying any processes or effects you’d like to program as part of the action, press the “Record” button - this will start to record all of the image adjustments that you apply to the open image.
At the point in the process where you use a selection tool such as the lasso tool to select a face present in the image, insert a “Stop Command” by stopping the recording process (press the “stop” icon), but leaving the action step highlighted in the action panel, and then going to the preferences icon (the icon of three lines in the upper righthand corner of the panel) and select “Stop Command”. Include a message in the Stop Command to let user know what will happen and what to do.
Once you have created the selection, press the “record” again in order to incorporate any additional processes, including feathering and other image adjustments.


Once you have completed your action, press the stop button (in order to stop recording). Then you can open a new image and press the “Play” icon in order to apply all of the steps automatically.
In order to export the action, first select your folder set in the actions panel, and go to Action Panel Preferences Icon > Save Actions. Then go to the main menu, Edit > Presets > Export / Import Presets…Select your folderand choose the location to save the action file. This file will then be operational on any computer running Photoshop CC, once it is imported.
Apply each of your presents to at least 2 of your original images from the image library project, and 2 of your own photos. These photos should be between 600 pixels and 1000 pixels wide, and must contain faces. Save these new images, and submit to Canvas as part of the assignment.