ART106O MODULE 3: KINETIC TEXT + TWEENING ANIMATIONS
KINETIC TEXT + KEYFRAME ANIMATIONS
Introduction
This module will explore a specific animation process and technique called “tweening”, and will also focus on animating and transforming text. Text in motion, or “kinetic text”, is something that is most readily associated with opening credits sequences in film and television, or with commercial advertising. While these are some of the more mainstream applications of animated text, this is a relatively newly defined category of animation, and many artists, designers and animators are working to push its boundaries into new territory.


Additionally, there is significant overlap between text animations and UX/UI design, including Web and App design, or interface design or HUD design for games. With a focus in animation, many of you might be interested in working at studio that produces feature length animations, animated series or animated shorts, however, many of the visual concepts and techniques that are critical to 2D animation are also highly applicable to film and video, UX/UI design, web design, game design and development, and even more traditional print design. This crossover is primarily why I developed this module, because I believe it helps make this course more useful for a larger range of professional interests (and developing portfolio pieces to apply to a range of different creative positions).
Text animations are now mostly done using tweening techniques, or, a combo of tweening techniques and 3D animation. This is why we will be focusing on tweening processes for the module 3 project, even though the earliest text animations were created using analog techniques more closely linked to stop-motion and frame animation.
Animated Text in Early Film
The earliest examples of animated text coincided with the developing of early film and cinema. Things like title sequences, subtitles, dialogue cards for silent films and other descriptive textual elements were first inserted in between films trips on a static background, and then later overlayed onto film sequences themselves. This was often achieved by optical printing the text on a film negative and overlaying and re-photographing the two, or by double exposing the negative first with the filmed sequence, and then with the text.


At first these textual elements were mostly still or would exhibit minimal motion or transformation. Sometimes they would fade in / out, vertically or horizontally enter or exit the frame, or would appear via a simple scale shift, rotation or “wipe” (where the text appear vertically or horizontally, but as if being revealed versus appearing to move up or down.) It was not until the 1950’s in American cinema that opening credits sequences began to be utilized to do more than simply present static textual information - instead, directors began to use them to reveal the first narrative components of the film, introducing visual style elements to the typography as well as animation and motion.
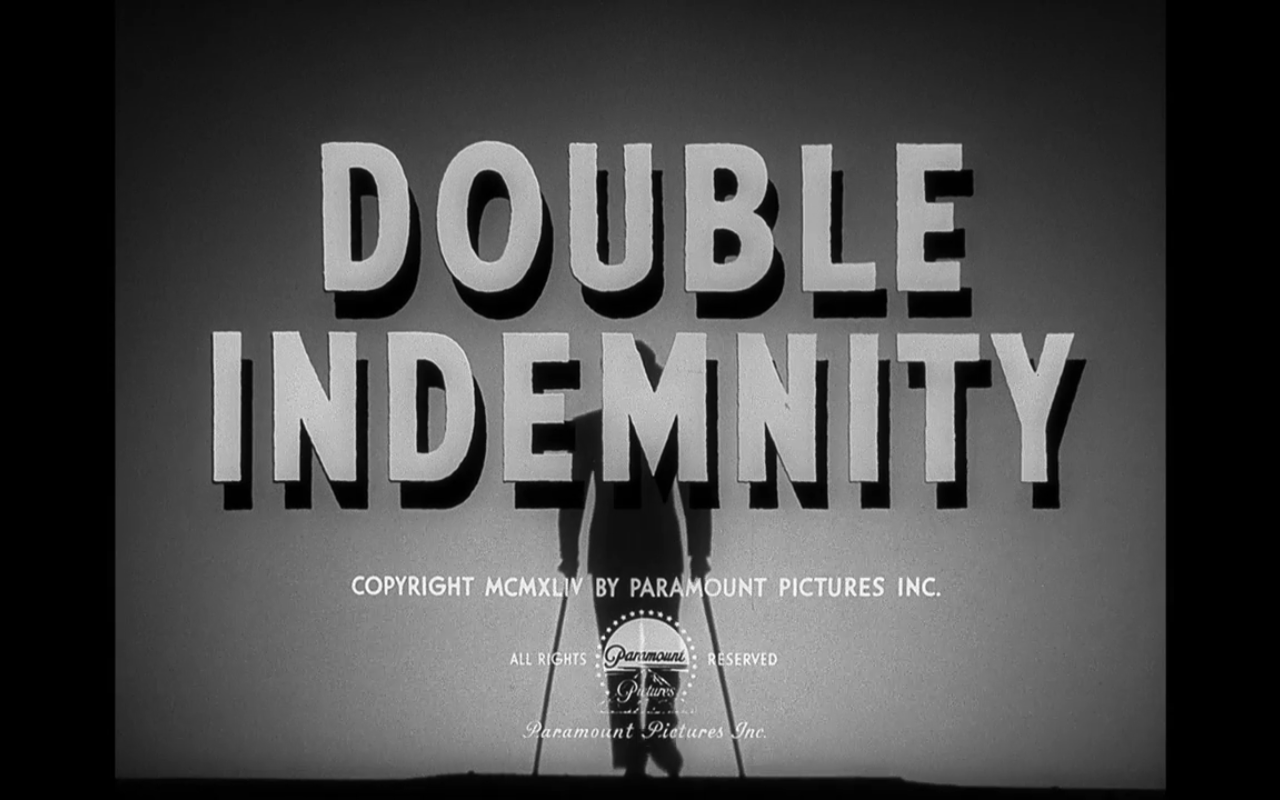
Saul and Elaine Bass
Saul and Elaine Bass were graphic designers who worked with commercial advertising and book and typographic designs in the late 1940’s and 1950s. Saul Bass is more commonly credited as the pioneer of animated title sequences starting in the 1950s, however, the first animated sequence he created was after establishing a working relationship as well as a personal partnership with Elaine Bass, and she was later credited as a long-time creative partner. For these reasons, I am presenting all of this work as collaborative pieces, including the title sequences created after Saul’s death.


The credits the two created, especially the opening credit sequences for Director Alfred Hitchcock’s, were pivotal animations that opened up new applications for animation and graphic design in film. The relationships between the two, as is often the case for techniques presented in this course, have continued to grow and expand together, as technology advances and artists continue to push original forms beyond their intended uses.
All the animations shown below were created without digital effects or tweening, but they all exhibit visuals and movements that would be ideal to animate using these programs now. Among these characteristics are the simplified way the text moves (horizontally and vertically), the distortion and perspective effects applied to some elements of text, the use of scale shifts (text growing larger or shrinking smaller), rotation and the combination of moving text and simplified shapes. Most of these animations were not frame animations, where the text was “redrawn” every frame, rather, the text movement was created by printing out letters onto transparent film, laying them over a background, then moving them incrementally and photographing each frame. When viewing these early opening credit sequences, make note of any similarities you observe between them and any recent film opening sequences.
Tweening and Digital Keyframe Animation
Unlike the other animation techniques we have discussed in the course, Tweening and digital keyframe animation processes are relatively recent technological developments. This is because these techniques require digital processing and automation that does not really have an analogue equivalent (except for, of course, frame by frame produced by an animator).
Tweening is a type of animation that automates the movement, appearance and transformation of individual pixel or vector objects over time based on keyframes. At its most basic level, the animator sets at least 2 keyframes for an object. These start and end frames could represent a change in position, rotation, color, transparency or size, among many other properties. Once these two frames are set along a timeline, the program - such as After Effects - will then automatically draw in the frames in between the keyframes.
This animation process is ideal for assigning timed, x/y movements, transformations and effects to simple objects (or more complex objects composed of multiple simple objects) such as text, points, lines, shapes and patterns, and also applying effects and masks to photographic images and video. Tweening - at least with After Effects - is not ideal for creating things like frame animations or complex character movements, however, After Effects can be used to compile frame animations and combine them with tweening effects or animations. This will be demonstrated a bit more in Module 4.
Tweening Animation + UX/UI Designs
The transformations and types of motions that are ideal for tweening techniques are very similar to the types of animations that most interfaces exhibit. These similarities can also apply to the way that these movements are generated on the programming side of things - for these reasons, this animation technique can be very useful for those of you interested in working with UX/UI (User Experience / User Interface) designs. These types of designers work with websites, apps and games.
Because of these similarities, I think it makes sense that some of the original tweening animation programs were developed in order to create websites and interactive projects, along with animations. In the late 1990s, Macromedia built and promoted Flash as a way to smoothly and easily create interface animations using tweening. Artists and designers then began to use Flash to create other types of vector-based motion graphics, which made a visual space for tween animations. Adobe After Effects, which had originally been designed to add post-production effects to digital video (using tweening / keyframes to automate those effects) also started to include vector graphics support, and more artists started using it to create more complex tween animations that combined vector and pixel graphics. From this perspective, digital tweening tools were both expediting an analog process and also directly influencing and shaping an entirely new form of animation, which is still being explored today.
Below are a few examples of early 2000’s websites and interactive projects made with macromedia Flash. Flash is no longer utilized to create websites (mostly because it was incompatible with smartphone browsers and very CPU heavy) and was replaced with the more standardized combination of HTML, CSS3 and programming extensions such as JavaScript. While these examples also exhibit some of the drawbacks of Flash websites (among them completely inconsistent design practices, and in some cases such overcomplicated interfaces that they detracted from the user experience and the overall functionality), animations like these also laid the groundwork for the motion in operating systems, applications, games and websites that has become common place, including scrolling windows, slideshows, animated icons and buttons, basic text effects and animated screen transitions.
Optional Viewing - web / interface animation
More on the connection between UX/UI Design and Kinetic Text - skip to 3:30 for focus on web and interface designs
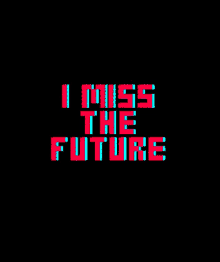
contemporary Kinetic Text Examples

The examples below are all what I would categorize as “kinetic text” - essentially animated text that is, in some cases, combined with other visual elements. These examples include more recent opening credit sequences, text montages that primarily work with animated text and other visuals, and audio-text projects that reveal written text that matches what is being spoken, performed or sung. These audio-text projects (the spoken ones) most closely resemble the projects you will be developing for Module 3.
Most of these animations are created using digital animation software such as After Effects, or a combination of this type of software and 3D animation software. In the cases were text is interacting with film or video, the two are created separately and then combined in post production - again, this is something that can be done in programs like After Effects.
When viewing all of these works, try to observe the following two elements: 1. The style and visual properties of the actual text (color, font, size, location, transparency, etc)
2. The kinds of movements and transformations the text is making (Is it appearing and disappearing? Is it moving on and off the screen? Is it rotating? Are letters transforming into other letters, or are there effects or other visuals components applied to the letters that changes how they might look?)
Then think about how those visual components change, emphasize or add to the meaning of the words themselves for you as the viewer. These can all be ideas that you work with in your audio-text projects.
The example below are animated opening credits for a VR game - the POV you are experiencing is one player as they view the 3D scene. So, while these animations are 3D, they are very much based on the 2D opening scenes for older James Bond movies.
